

If you’ve ever wondered how to check Zelle transaction history on the Chase website, you’re not alone. Keeping track of your money is more than just logging in and glancing at your balance. Whether you’re someone who uses Zelle daily to split bills with friends or just occasionally to pay rent, knowing where to find your transaction history on Chase can save you stress.
The Chase website makes it possible to see exactly when, where, and to whom you sent or received money through Zelle. This is not only helpful for financial planning but also crucial when you need proof of payment. In this guide, I’ll walk you through everything step by step.
- How to Apply for a Cash App Card
- How to Get Cash With a Credit Card
- Does Venmo Notify if You Look at Someone’s Profile
- www.parentpay.com Login – Access to Your ParentPay Account
- OneMain Financial Brightway Credit Card – Benefits, Features & Application
- www.synchrony.com Login – Securely log in to your Synchrony Account
- Bank of America Checking Account – Open a Checking Account
- What is Checking Account? A Simple Guide
- How to Transfer Money from Chime to Cash App
- Cash a Check Online Instantly Without Ingo
- How Does Zelle Make Money
- How to Get Free Money on Cash App
Why You Should Track Your Zelle Transactions
Keeping an eye on your Zelle payments isn’t just a nice idea; it’s a must. Think about this: you’re splitting dinner bills, sending money for rent, or paying back a friend. All of these small payments add up. If you’re not checking your Zelle history, you might be losing track of where your money is going.
From a financial perspective, your Zelle history acts like a personal diary of your money moves. It helps you with budgeting, because when you look at your past transactions, you can see patterns in your spending. Maybe you’ll realize you’re sending too much on little things you forgot about.
But it’s not just about budgeting, it’s about security. Sometimes payments can go wrong. Maybe you typed the wrong email, or maybe the payment got delayed. By checking your Zelle history on Chase, you can confirm whether the transaction went through. Plus, it’s your best defense against fraud. If something looks off, you’ll spot it early.
Lastly, there’s peace of mind. I don’t know about you, but I sleep better knowing that all my money transfers are accounted for. No guessing, no stressing, just facts on the screen.
Understanding Zelle and Chase Integration
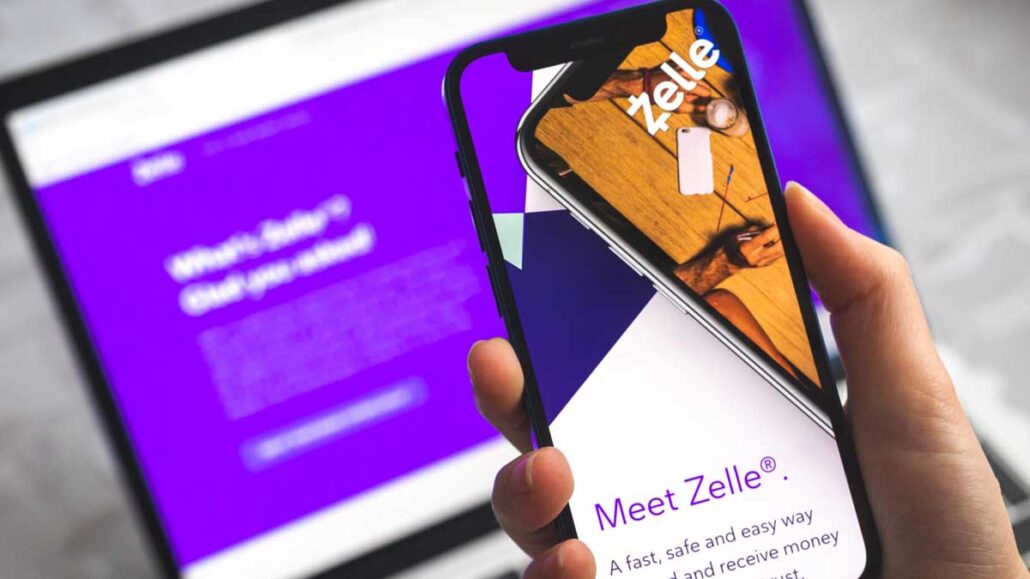
Before I show you how to check your Zelle transactions on Chase, let’s make sure you fully understand how Zelle works with Chase. Zelle is a digital payment network that lets you send and receive money instantly using just an email or phone number. Think of it as a quick cash handoff, but without the actual cash.
Chase has partnered with Zelle, so you don’t need to download a separate Zelle app. Everything is built right into your Chase account, whether you’re on the website or using the mobile app. That’s the beauty of it, you don’t juggle multiple platforms.
Here’s what you get when using Zelle with Chase:
- Instant payments: Most transfers go through in minutes.
- Easy setup: Just link your email or phone number.
- Built-in security: Chase already has strong protections, and Zelle benefits from that.
By combining Chase and Zelle, you get speed, convenience, and security all in one place. And the best part? Your transaction history is automatically stored within your Chase account. That’s where we’re heading next.
How to Access the Chase Website Securely
Before you dive into your Zelle transaction history, you’ll need to log in to your Chase account safely.
Here’s a quick breakdown of how you should log in:
- Go to the official Chase website: Always type in the URL yourself (chase.com). Don’t click random links in emails.
- Enter your credentials: Use your username and password. Make sure your password isn’t something obvious like your birthday.
- Two-factor authentication: Chase might text you a code or send one to your email. Enter it, it’s an extra shield.
- Check the URL lock: Look for the little padlock icon next to the web address. That means the site is secure.
Once you’re in, you’ll see your account dashboard. From there, everything you need, including your Zelle history, is just a few clicks away.
Step-by-Step Guide: How to Check Zelle Transaction History on the Chase Website
Alright, here’s the part you’ve been waiting for: the exact steps. I’ll break it down nice and easy, so even if you’re not a tech person, you can follow along.
- Log in to your Chase account (as explained earlier).
- Select your bank account: Choose the checking account linked with Zelle.
- Go to ‘Account Activity’ or ‘Transactions’: This section shows all the ins and outs of your account.
- Filter for Zelle payments: You’ll see transactions labelled as “Zelle.” This makes it easy to spot them.
- Click on a transaction: When you click, it opens details like date, recipient, and status (completed, pending, or cancelled).
What I like about Chase’s setup is how clear everything is. You don’t have to dig deep; it’s right there under your activity. If you want, you can even search by date or name, which comes in handy if you’re trying to find a specific payment.
I recommend checking this regularly, especially if you send or receive a lot of payments. It’s like checking your receipts after shopping, you know exactly what went where.
Checking Zelle Transaction History on the Chase Mobile App
Now, let’s talk about the Chase mobile app. Sometimes you don’t want to open your laptop or desktop just to check a payment. The good news is that Chase has made it super easy to check your Zelle transaction history directly on your phone.
Here’s how to do it step by step:
- Open the Chase app on your smartphone.
- Log in securely using your fingerprint, Face ID, or password.
- Tap on the checking account you linked with Zelle.
- Go to the “Activity” tab; this is where all your transactions show up.
- Look for transactions labelled “Zelle”.
It’s that simple. The mobile app mirrors the website, but it feels more convenient because it’s right in your hand. You can check payments anytime, whether you’re in line for coffee, at work, or even while travelling.
Always make sure your app is up to date. Chase regularly updates its app to fix bugs and improve security. If you’re running an old version, you might miss out on those improvements.
How Long Does Chase Keep Zelle Transaction History?
This is one of the most common questions people ask: “How far back can I see my Zelle history on Chase?” I had the same question when I needed proof of an old payment for tax purposes.
The truth is, Chase keeps your Zelle transaction history for as long as you keep your account. That means every payment you’ve ever made or received with Zelle is stored in your transaction log. Unlike some standalone apps that might limit history to a certain number of months, Chase treats your Zelle payments like any other bank transaction.
Here’s what you need to know:
- Recent transactions: Show up almost instantly (sometimes within minutes).
- Older transactions: You can scroll back months or even years, depending on how long you’ve had the account.
- Statements: If you can’t find a transaction in your activity log, check your monthly statements. They also list Zelle transfers.
If you’re worried about needing your Zelle history for taxes, business records, or personal budgeting, you’re covered.
Downloading and Saving Your Zelle History
Sometimes, just seeing your transactions online isn’t enough. You might want a copy you can store, share, or even print. That’s where downloading your Zelle history on Chase comes in handy. Bookkeeping.
Here’s how to do it:
- Log in to the Chase website on your computer.
- Go to your account activity page.
- Filter your transactions so only Zelle payments show.
- Look for the “Download” option (usually on the right side of the screen).
- Choose your format: PDF, CSV, or Excel.
If you’re someone who likes to keep physical records, you can print the PDF version. On the other hand, if you’re more into organizing finances digitally, the Excel or CSV format is better. That way, you can sort, analyze, and even create charts of your Zelle spending habits.
Remember, keeping a personal copy of your history is not just about organization; it’s also about security. If you ever have a dispute or need proof for taxes, having your records will save you a lot of headaches.
Troubleshooting Issues with Zelle History on Chase
Okay, so what if things don’t go smoothly? Sometimes, a transaction doesn’t show up right away, or you’re expecting money from a friend, and it looks like it disappeared into thin air.
Here are some common issues and fixes:
- Issue: Transaction not showing up: Sometimes it takes a little while for Zelle payments to process. Wait a few minutes and refresh your account activity.
- Issue: Wrong recipient listed: Double-check the email or phone number linked to Zelle. If you accidentally sent money to the wrong person, contact Chase support immediately.
- Issue: Payment stuck as “Pending”: This usually means the recipient hasn’t enrolled in Zelle yet. They’ll need to sign up to receive the money.
- Issue: Download option not working: Try switching to a different browser or clearing your cache. If the problem continues, Chase’s support team can help.
If none of these quick fixes work, I always suggest calling Chase directly. Their customer support is trained to handle Zelle issues, and in most cases, they can resolve it faster than you trying to troubleshoot on your own.
Comparing Chase Zelle History vs. Other Banks
Now, let’s put Chase under the spotlight. How does it compare with other banks when it comes to viewing Zelle history? From my experience, Chase has one of the smoothest setups.
For example:
- Chase: Lets you filter transactions, download files, and access years of history.
- Smaller banks: Often limit you to just recent activity, like the last 30 or 60 days.
- Credit unions: Some don’t even fully integrate Zelle; you might need the standalone app.
The big advantage with Chase is that it integrates Zelle seamlessly into both the website and mobile app. You don’t feel like you’re using a third-party tool. It feels like a natural part of your banking.
This is especially helpful if you’re someone who relies heavily on Zelle. You don’t want to bounce between apps or deal with limited history. Chase gives you everything in one place, with better record-keeping than many competitors.
Security Considerations When Using Zelle on Chase
Zelle itself is secure, but mistakes often happen on the user’s side. Since Zelle payments are instant and usually irreversible, you want to make sure you’re sending money to the right person. Once the money leaves your account, it’s gone for good, kind of like handing over cash.
Here are a few tips to follow to stay safe with Zelle on Chase:
- Double-check recipient details: Before hitting send, always confirm the email or phone number with the person you’re paying.
- Use alerts: Chase allows you to set up transaction alerts. That way, you get notified every time money moves.
- Avoid strangers: Zelle is designed for people you know and trust. Never use it for online marketplace deals or strangers you meet on social media.
- Log in securely: Make sure to use Chase’s two-factor authentication and avoid logging in on public Wi-Fi.
On top of that, Chase adds its security layers, like encryption and fraud monitoring. So even though no system is 100% foolproof, using Zelle through Chase is much safer than handling cash or mailing checks.
Think of it this way: you lock your front door at night not because you expect trouble, but because it’s smart. Treat your Zelle usage the same way, lock it down with good habits.
Tips for Managing Zelle Payments on Chase
Now that you know how to check your Zelle history, let’s talk about managing your payments better. It’s not just about sending and receiving money; it’s about making Zelle work for you.
Here are some practical tips to use:
- Set transaction alerts: You get notified every time money moves in or out. This helps you stay on top of things without constantly checking the app.
- Create a Zelle budget: If you use Zelle for everyday stuff, splitting bills, paying rent, and sending money to family, it adds up quickly. You can keep a separate budget for Zelle to avoid overspending.
- Label your transactions: Chase allows you to add notes when sending money. You can use this feature religiously. For example, “Rent January” or “Dinner with Sam.” When you look back at your history, you know exactly what each payment was for.
- Use recurring transfers wisely: If you pay the same person every month (like a landlord or family member), you can schedule recurring transfers. It saves time and keeps me from forgetting.
- Keep your contact list updated: Over time, your Zelle contact list might get cluttered with old numbers or emails.
These little steps make a huge difference. Instead of just using Zelle reactively, it makes you feel like you’re actually in control of your payments.
Frequently Asked Questions (FAQs)
How do I check my Zelle history on Chase?
Log in to your Chase account (website or app), select your checking account, and go to the activity section. Transactions labelled “Zelle” will show your full payment history.
Is it possible to see Zelle’s history?
Yes, absolutely. Chase stores all of your Zelle transactions, and you can filter them by date or download them for records.
How can I see my transaction history on Chase?
Go to the “Account Activity” or “Transactions” tab on your Chase account dashboard. You’ll see every debit, credit, and Zelle payment listed there.
How to find Zelle information on the Chase app?
Open the Chase mobile app, log in, tap your checking account, then go to “Activity.” Look for transactions marked “Zelle” to view the details.
Can I download my Zelle history for taxes?
Yes. From the Chase website, you can download your Zelle history as a PDF, CSV, or Excel file. Many people do this for budgeting or tax purposes.
Conclusion
By now, you should feel confident about how to check Zelle transaction history on the Chase website and even through the mobile app. It’s not complicated once you know where to look, and with the right habits, like downloading your history, setting alerts, and double-checking details, you can make Zelle a powerful tool for managing your money.
Zelle through Chase is fast, secure, and convenient. But like any financial tool, it works best when you stay organized and pay attention to the details. Think of it like keeping a diary of your money; it tells you where your dollars went and helps you plan where they’ll go next.
So, next time you’re wondering if a payment went through or need proof of a transfer, just log in, check your history, and rest easy knowing your money trail is right at your fingertips.