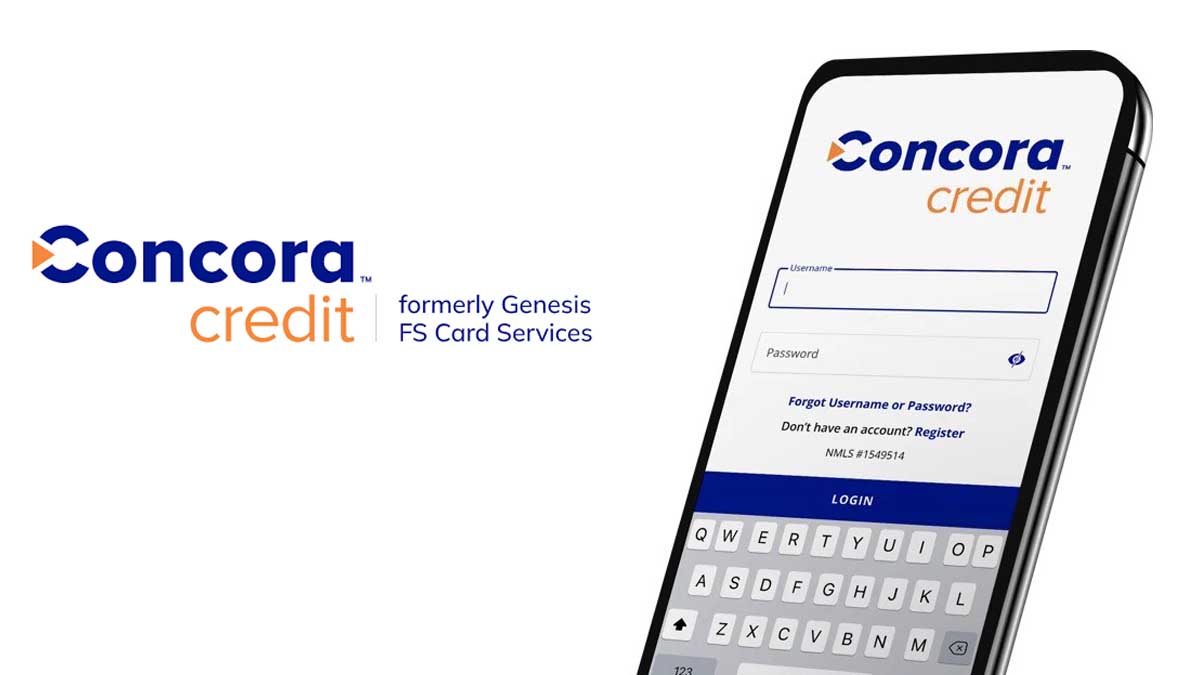
Blog

  • Wellsfargo.com/confirmcard – How to Confirm Your Wells Fargo Card

    Wellsfargo.com/confirmcard – How to Confirm Your Wells Fargo Card

    Congratulations on your new Wells Fargo card! Before you can start using it, you need to confirm it. This Wellsfargo.com/confirmcard process is simple and straightforward, but it’s important to follow the steps carefully to avoid any problems. In this article, we’ll walk you through the entire process of confirming your Wells Fargo card, step-by-step. We’ll also provide some helpful tips and troubleshooting advice.

    Wellsfargo.com/confirmcard

    Wells Fargo is one of the largest banks in the United States, and its credit cards are some of the most popular. If you are looking to apply for a Wells Fargo credit card, you will need to confirm your application online. This can be done by visiting the Wells Fargo website and entering the confirmation code that was sent to you in an email.

    The Wells Fargo credit card confirmation process is relatively straightforward, but it is important to rank well for the keyword “Wellsfargo.com/confirmcard” so that potential customers can easily find your website. There are a number of factors that influence search engine rankings for this keyword, including domain authority, page authority, backlinks, keyword usage, and on-page optimization.

    What is Wells Fargo ConfirmCard?

    Wellsfargo.com/confirmcard is a website where you can confirm your Wells Fargo card online. This is a convenient way to confirm your card without having to call customer service.

    To confirm your card, simply go to Wellsfargo.com/confirmcard and enter your card number and expiration date. You will then be asked to verify your identity by answering a security question. Once you have verified your identity, your card will be confirmed.

    Why is it important to confirm your Wells Fargo card?

    Wells Fargo is a multinational financial services company that offers a variety of products and services to individuals and businesses. One of its most popular products is the Wells Fargo ConfirmCard, a prepaid card that can be used to make purchases online and in stores.

    Wells Fargo ConfirmCard through wellsfargo.com/confirmcard is important because it provides a safe and convenient way to make purchases without having to use a credit or debit card. The card can be used to make purchases on websites that do not accept prepaid cards, and it can also be used to withdraw cash from ATMs.

    Important

    However, there are several reasons why it is important to confirm your Wells Fargo card:

    • To protect your account from fraud. By confirming your card, you are helping Wells Fargo to verify that you are the authorized user of the card. This can help to prevent fraudsters from using your card without your permission.
    • To enable fraud protection features. Some of Wells Fargo’s fraud protection features, such as purchase alerts and transaction reviews, require you to have confirmed your card. By confirming your card, you can ensure that you are able to take advantage of these important features.
    • To use your card for online and mobile purchases. Many merchants require you to confirm your card before you can use it for online or mobile purchases. By confirming your card, you can avoid having to contact Wells Fargo to request a one-time code each time you want to make an online or mobile purchase.
    • To receive certain benefits. Some Wells Fargo card benefits, such as extended warranties and purchase protection, are only available to cardholders who have confirmed their cards. By confirming your card, you can ensure that you are eligible for all of the benefits that your card offers.

    To confirm your Wells Fargo card, you can either activate it online or by calling Wells Fargo customer service. Once you have confirmed your card, you will be able to use it for all of the purposes described above.

    How to confirm your Wells Fargo Card online at Wellsfargo.com/confirmcard

    To confirm your Wells Fargo card online, follow these steps:

    1. Go to the Wells Fargo website and log in to your account.
    2. Click on the “Accounts” tab and select the account that your card is linked to.
    3. Click on the “Cards” tab and select the card that you want to confirm.
    4. Click on the “Confirm Card” button.
    5. Enter the following information:
    6. Full account number on your card
    7. 3-digit CVV on the back of your card
    8. Date of birth of the account holder
    9. Last 4 digits of the account holder’s Social Security number or Individual Taxpayer Identification number
    10. Click on the “Confirm Card” button.

    Your card should now be confirmed. You should receive a confirmation message from Wells Fargo.

    How to confirm your Wells Fargo Card by phone

    To confirm your Wells Fargo card by phone, follow these steps:

    1. Call Wells Fargo customer service at 1-800-869-3557.
    2. When prompted, select the option to speak to a customer service representative.
    3. Tell the customer service representative that you want to confirm your Wells Fargo card.
    4. The customer service representative will ask you for the following information:
    5. Full account number
    6. 3-digit CVV code
    7. Account holder’s date of birth
    8. Last 4 digits of the account holder’s Social Security number or Individual Taxpayer Identification number
    9. The customer service representative will then confirm your card and you will be able to start using it for purchases.

    If you have any problems confirming your card by phone, you can ask the customer service representative to walk you through the process.

    How to confirm your Wells Fargo Card by ATM

    To confirm your Wells Fargo card by ATM, follow these steps:

    1. Go to any Wells Fargo ATM.
    2. Insert your debit card.
    3. Enter your PIN.
    4. Select the “Confirm Card” option.
    5. Follow the on-screen instructions.

    You will be asked to enter the following information:

    • Full account number
    • 3-digit CVV code
    • Account holder’s date of birth
    • Last 4 digits of the account holder’s Social Security number or Individual Taxpayer Identification number

    Once you have entered all of the required information, your card will be confirmed and you will be able to start using it for purchases.

    Troubleshooting common problems with Wellsfargo.com/confirmcard

    Something went wrong. Please try again later

    This error message can occur for a number of reasons, such as a technical issue with the Wells Fargo website, or a problem with your internet connection. To troubleshoot this issue, try the following:

    • Refresh the page.
    • Try confirming your card again later.
    • Try confirming your card using a different internet connection.
    • If you are still having problems, contact Wells Fargo customer service for assistance.

    We are unable to confirm your card at this time

    This error message can occur if there is a problem with your account information, or if your card has been flagged for fraud. To troubleshoot this issue, try the following:

    • Make sure that you are entering your account information correctly.
    • If you are still having problems, contact Wells Fargo customer service to verify your account information and to check for any fraud alerts.

    Your card has already been confirmed

    If you receive this error message, it means that your card has already been confirmed. You can try confirming your card again, but if you receive the same error message, then your card is already confirmed and you can start using it for purchases.

    I cannot confirm my card online

    If you are unable to confirm your card online, you can try confirming your card by phone or at a Wells Fargo ATM. To confirm your card by phone, call Wells Fargo customer service at 1-800-869-3557. To confirm your card at an ATM, locate a Wells Fargo ATM and insert your card and PIN. Select the “Activate Card” option and follow the instructions on the ATM screen.

    Frequently asked questions about Wellsfargo.com/confirmcard

    What is Wellsfargo.com/confirmcard?

    Wellsfargo.com/confirmcard is a website where you can confirm your Wells Fargo card. This is a simple process that helps Wells Fargo to protect your account from fraud.

    Why do I need to confirm my Wells Fargo card?

    Confirming your Wells Fargo card helps Wells Fargo to verify that you are the rightful owner of the card and that you have received it. This helps Wells Fargo to detect and prevent fraudulent transactions.

    How do I confirm my Wells Fargo card on Wellsfargo.com/confirmcard?

    To confirm your Wells Fargo card on Wellsfargo.com/confirmcard, follow these steps:

    1. Go to Wellsfargo.com/confirmcard.
    2. Enter your full account number, 3-digit CVV code, date of birth, and last 4 digits of your Social Security number or Individual Taxpayer Identification number.
    3. Click on the “Confirm Card” button.
    4. You will receive a confirmation message if your card has been successfully confirmed.

    What if I have problems confirming my Wells Fargo card on Wellsfargo.com/confirmcard?

    If you have problems confirming your Wells Fargo card on Wellsfargo.com/confirmcard, you can try confirming your card by phone or at a Wells Fargo ATM. To confirm your card by phone, call Wells Fargo customer service at 1-800-869-3557. To confirm your card at an ATM, locate a Wells Fargo ATM and insert your card and PIN. Select the “Activate Card” option and follow the instructions on the ATM screen.

    How long does it take to confirm my Wells Fargo card?

    Once you have confirmed your Wells Fargo card, it should be immediately available for use. However, it may take up to 24 hours for all of your features to be activated.

    What if I have already received my Wells Fargo card but I cannot confirm it online?

    If you have already received your Wells Fargo card but you cannot confirm it online, you can try confirming your card by phone or at a Wells Fargo ATM. To confirm your card by phone, call Wells Fargo customer service at 1-800-869-3557. To confirm your card at an ATM, locate a Wells Fargo ATM and insert your card and PIN. Select the “Activate Card” option and follow the instructions on the ATM screen.

    What are the benefits of confirming my Wells Fargo card?

    There are several benefits to confirming your Wells Fargo card:

    • Increased security: By confirming your card, you are making it more difficult for someone else to use your card without your permission.
    • Better customer service: If you have any problems with your card, Wells Fargo will be able to better assist you if you have confirmed your card.
    • Peace of mind: Knowing that your card is confirmed can give you peace of mind knowing that your account is more secure.

    What are the risks of not confirming my Wells Fargo card?

    There are a few risks to not confirming your Wells Fargo card:

    • Increased risk of fraud: If your card is not confirmed, it is more likely to be used fraudulently.
    • Limited features: Some features of your Wells Fargo card, such as mobile wallet payments, may not be available if your card is not confirmed.
    • Difficulty getting customer service: If you have any problems with your card and it is not confirmed, Wells Fargo may be less likely to be able to help you.
  • How to Start a Hot Shot Business

    How to Start a Hot Shot Business

    Hot shot trucking is a niche industry that involves hauling small to medium-sized loads using pickup trucks and trailers. Hot shot truckers are often called upon to transport urgent or specialized cargo, such as construction equipment, furniture, and vehicles. Learn how to start a hot shot business

    How to Start a Hot Shot Business

    Starting a hot shot business can be a rewarding experience, but it’s important to do your research and plan carefully. In this guide, we’ll walk you through the steps involved in starting a successful hot shot business, from choosing the right equipment to marketing your services.

    We’ll cover everything from the legal requirements to the financial aspects of running a hot shot business. We’ll also provide tips on how to find and secure loads, and how to build a strong reputation in the industry.

    If you’re interested in starting a hot shot business, this guide is for you. We’ll help you get started on the right foot and give you the tools you need to succeed.

    What is a Hot Shot Business?

    A hot shot business is a trucking business that specializes in hauling small to medium-sized loads using pickup trucks and trailers. Hot shot truckers are often called upon to transport urgent or specialized cargo, such as construction equipment, furniture, and vehicles.

    Hot shot businesses can be operated as either owner-operator businesses or as fleet businesses. Owner-operators own and operate their own trucks and trailers, while fleet businesses own a fleet of trucks and trailers and hire drivers to operate them.

    Hot shot businesses are typically more flexible than traditional trucking businesses. Hot shot truckers can often choose their own loads and set their own hours. This flexibility can be appealing to drivers who want to have more control over their work life.

    Hot shot businesses can also be more profitable than traditional trucking businesses. This is because hot shot truckers can often charge higher rates for their services, especially for urgent or specialized cargo.

    Why is hot shot trucking a good business opportunity?

    Hot shot trucking is a good business opportunity for a number of reasons, including:

    • Flexibility: Hot shot truckers have the flexibility to set their own hours and choose their own loads. This can be a great option for people who want to be their own boss and have more control over their work life.
    • Good earning potential: Hot shot truckers can earn a good living, especially if they specialize in hauling high-value or urgent cargo.
    • Low startup costs: Hot shot trucking businesses can be started with relatively low startup costs, compared to other types of trucking businesses.
    • Growing demand: The demand for hot shot trucking services is growing, as businesses and consumers need to move smaller loads quickly and efficiently.

    Benefits of starting a hot shot business

    There are many benefits to starting a hot shot business. Here are a few of the most notable:

    Flexibility

    Hot shot truckers have the flexibility to set their own hours and choose their own loads. This can be a great option for people who want to be their own boss and have more control over their work life.

    Good earning potential

    Hot shot truckers can earn a good living, especially if they specialize in hauling high-value or urgent cargo. Rates for hot shot trucking can range from $1 to $2 per mile, and some hot shot truckers can earn upwards of $100,000 per year.

    Lower startup costs

    Hot shot trucking businesses can be started with relatively low startup costs, compared to other types of trucking businesses. This is because hot shot truckers typically use pickup trucks and trailers, which are less expensive to purchase and maintain than traditional semi-trucks.

    Growing demand

    The demand for hot shot trucking services is growing, as businesses and consumers need to move smaller loads quickly and efficiently. This is due to the rise of e-commerce and the increasing need for same-day delivery.

    Requirement on how to start a hot shot business

    Legal requirements for a hot shot business:

    • Business structure: You will need to choose a business structure, such as a sole proprietorship, LLC, or corporation.
    • DOT number: You will need to obtain a Department of Transportation (DOT) number. This number is required for all commercial motor carriers, including hot shot businesses.
    • MC number: If you plan to haul freight interstate, you will need to obtain a motor carrier (MC) number from the Federal Motor Carrier Safety Administration (FMCSA).
    • Commercial driver’s license (CDL): If you will be driving the truck yourself, you will need to have a CDL.
    • Medical card: You will also need to have a medical card that is valid for commercial driving.
    • Commercial insurance: You will need to have commercial insurance for your truck and trailer.

    Financial requirements

    • Startup costs: The startup costs for a hot shot business can vary depending on the size and type of equipment you need. However, you should budget for at least $50,000 to $100,000.
    • Operating expenses: Your operating expenses will include fuel, maintenance, insurance, and other costs associated with running your business.
    • Working capital: You will need to have enough working capital to cover your startup costs and operating expenses until you start generating revenue.

    Equipment requirements on how to start a hot shot business

    • Truck: You will need a pickup truck with a flatbed trailer.
    • Cargo straps and chains: You will need cargo straps and chains to secure your loads.
    • Tarps: You may need tarps to cover your loads if they are not weatherproof.
    • Other equipment: You may also need other equipment, such as a loading ramp or a cargo tracking system.

    Different Types of Hot Shot Businesses

    General hot shot

    This is the most common type of hot shot business. General hot shot truckers haul a variety of loads, including machinery, equipment, and construction materials. They typically use pickup trucks with gooseneck trailers, which are more versatile than bumper pull trailers.

    Heavy haul hot shot

    Heavy haul hot shot truckers specialize in hauling large and heavy loads, such as construction equipment, commercial vehicles, and industrial machinery. They typically use specialized equipment, such as lowboy trailers and heavy-duty trucks.

    Expedited hot shot

    Expedited hot shot truckers deliver loads quickly and efficiently. They typically use high-performance pickup trucks and trailers, and they are often willing to work long hours and travel long distances.

    Local hot shot

    Local hot shot truckers deliver loads within a limited geographic area. They typically have a good understanding of the local roads and traffic conditions, which allows them to deliver loads more efficiently.

    Contract hot shot

    Contract hot shot truckers work under contract with a specific company or organization. They typically haul specific types of loads or work on specific routes.

    Owner-operator hot shot

    Owner-operator hot shot truckers own their own trucks and trailers. They are responsible for all aspects of their business, including finding customers, managing their finances, and maintaining their equipment.

    Leased operator hot shot

    Leased operator hot shot truckers lease their trucks and trailers from a trucking company. They are typically paid by the mile or by the load.

    Brokered hot shot

    Brokered hot shot truckers find loads through brokers. Brokers act as intermediaries between shippers and truckers, and they match truckers with loads that meet their needs.

    Independent hot shot

    Independent hot shot truckers find loads and manage their own business without the help of a broker.

    Team hot shot

    Team hot shot truckers work together to drive a truck and trailer. This allows them to cover more miles and deliver loads more quickly.

    App-based hot shot

    App-based hot shot businesses allow truckers to find loads through a mobile app. This is a relatively new type of hot shot business, but it is growing in popularity.

    Franchise hot shot

    Franchise hot shot businesses allow truckers to start their own hot shot business using a proven business model. This can be a good option for truckers who want to start their own business but don’t have the experience or resources to do it on their own.

    Steps of how to start a hot shot business

    Steps on how to start a hot shot business:

    1. Get the necessary licenses and permits. This includes a commercial driver’s license (CDL), a USDOT number, and a medical card. You may also need additional permits depending on the state(s) where you plan to operate.
    2. Register your business with the state. This will give you a legal entity for your business and allow you to collect sales tax.
    3. Purchase equipment. This includes a truck, trailer, and any other necessary gear. You may also want to consider investing in a GPS tracking system and a load board subscription.
    4. Get commercial insurance. This is essential to protect yourself and your business in case of an accident.
    5. Find loads. There are a number of ways to do this, including using load boards, contacting brokers directly, and networking with other hotshot drivers.
    6. Market your business. Let potential customers know that you are available to haul their loads. You can do this through online and offline marketing channels.
    7. Provide excellent customer service. This is essential for building a successful hot shot business. Make sure to communicate effectively with your customers and meet their needs.

    Tip success

    Here are some tips to success on a hot shot business:

    • Have a solid business plan. This will help you define your goals, strategies, and target market. It will also help you track your progress and make necessary adjustments along the way.
    • Purchase reliable equipment. Your truck and trailer are your livelihood, so it’s important to invest in quality equipment that will keep you on the road and profitable.
    • Network with other hot shot drivers and shippers. This is a great way to find loads, get referrals, and learn from others in the industry.
    • Be proactive in marketing your business. Let potential customers know that you’re available and willing to haul their loads. You can do this through online advertising, networking, and word-of-mouth.
    • Be reliable and professional. Show up on time, meet your commitments, and provide excellent customer service. This will help you build a strong reputation and attract repeat business.
  • What Does Business Chat Mean on Instagram

    What Does Business Chat Mean on Instagram

    Business Chat is a messaging feature on Instagram that allows businesses to communicate with customers directly through the app. It is a separate experience from regular Instagram DMs, and it offers a number of features that are specifically designed for businesses, such as:

    Suggested responses: Business Chat uses machine learning to suggest responses to common customer questions, which can help businesses save time and provide better customer service.

    What Does Business Chat Mean on Instagram

    In-chat payments: Businesses can accept payments from customers directly through Business Chat, which can make it easier for customers to make purchases.

    Insights: Businesses can view detailed insights into their Business Chat conversations, such as the most common questions asked by customers and the average response time.

    What is business chat on Instagram?

    A Business Chat on Instagram is a direct message (DM) between a business account and a customer account. Business Chats are distinguished from regular DMs by a gray text label that appears below the customer’s profile picture.

    How does Business Chat work?

    To use Business Chat, businesses need to have a business account on Instagram. Once they have a business account, they can enable Business Chat by going to their profile settings and selecting the “Business Chat” tab.

    Once Business Chat is enabled, customers can start a chat with a business by tapping the “Contact” button on the business’s profile. Customers can also send a direct message to a business account, and the business will have the option to upgrade the conversation to Business Chat.

    When customers start a Business Chat conversation, they will see a gray text label that says “Business Chat” below the business’s profile picture and username. This label helps customers to distinguish between Business Chat conversations and regular Instagram DMs.

    Benefits of using Business Chat

    There are a number of benefits for businesses to use Business Chat, including:

    • Improved customer service: Business Chat makes it easier for businesses to provide customer service directly through Instagram. This can help businesses to resolve customer issues more quickly and efficiently.
    • Increased sales: Business Chat can help businesses to increase sales by making it easier for customers to make purchases. Businesses can accept payments directly through Business Chat, and they can also use Business Chat to promote their products and services.
    • Better insights: Business Chat provides businesses with detailed insights into their customer conversations. This information can be used to improve customer service and marketing campaigns.

    How to use business chat on Instagram

    To use business chat on Instagram, follow these steps:

    1. Make sure you have a business account. If you don’t have a business account, you can switch to one by going to your profile and tapping Settings and privacy > Account > Switch to Professional account.
    2. Enable business chat. Once you have a business account, you need to enable business chat in your settings. To do this, go to Settings and privacy > Business > Messaging and toggle on Business chat.
    3. Start receiving messages. Once business chat is enabled, you will start receiving messages from customers in your Instagram inbox. You can access your inbox by tapping the Chats icon at the top of the Instagram app.

    To respond to a message, simply tap on it and start typing. You can also use suggested responses, quick replies, and in-chat payment links to make it easier to respond to customers.

    How to enable business chat on Instagram

    To enable business chat on Instagram, follow these steps:

    1. Open the Instagram app and go to your profile.
    2. Tap Settings and privacy in the bottom right corner.
    3. Tap Business.
    4. Tap Messaging.
    5. Toggle on Business chat.

    Once you have enabled business chat, you will start receiving messages from customers in your Instagram inbox. You can access your inbox by tapping the Chats icon at the top of the Instagram app.

    How to use business chat to improve customer service on Instagram

    Business chat can be a powerful tool for improving customer service on Instagram. By following these tips, you can use business chat to provide faster, more efficient, and more personalized customer service:

    • Set up a welcome message. This is a great way to greet customers and let them know how you can help them. Your welcome message should be clear, concise, and friendly.
    • Use suggested responses. These responses are based on automatic processing of messages, so they can help you to respond to common customer questions quickly and easily. To use suggested responses, simply tap on the Suggested responses button when you are responding to a message.
    • Create quick replies. These are custom responses that you can create for frequently asked questions. To create a quick reply, go to Settings and privacy > Business > Messaging > Quick replies.
    • Personalize your responses. Even if you are using suggested responses or quick replies, take the time to personalize your responses to each customer. This shows customers that you are paying attention to them and that you care about their individual needs.
    • Be responsive. Try to respond to customer messages as quickly as possible. This shows customers that you are interested in helping them and that you value their time.

    Be helpful and friendly. Your goal should be to provide customers with a positive customer service experience. Be helpful, friendly, and understanding when responding to customer messages.

    How to use business chat to generate leads on Instagram

    • Offer a lead magnet. A lead magnet is an incentive that you offer to potential customers in exchange for their contact information. This could be anything from a free ebook to a discount on your products or services.
    • Promote your lead magnet in your Instagram posts and stories. Let your followers know that you are offering a lead magnet and how they can claim it.
    • Use business chat to collect contact information from potential customers who are interested in your lead magnet. When a potential customer messages you about your lead magnet, ask them for their name and email address.
    • Nurture your leads. Once you have collected contact information from potential customers, start nurturing them through the sales funnel. This could involve sending them email newsletters, offering them exclusive discounts, or inviting them to webinars or events.

    To use business chat to increase sales on Instagram

    • Answer customer questions about your products or services. When customers message you with questions about your products or services, be sure to answer their questions promptly and accurately. This shows customers that you are knowledgeable about your products or services and that you are interested in helping them.
    • Offer personalized recommendations. Based on customer’s interests and past purchases, you can offer them personalized recommendations for products or services that they might be interested in. This shows customers that you are paying attention to them and that you care about their needs.
    • Use in-chat payment links. This allows customers to pay for products or services without leaving the chat. This makes it easy for customers to purchase from you and reduces the likelihood of them abandoning their cart.
    • Offer discounts and promotions. You can use business chat to offer discounts and promotions to customers who are interested in your products or services. This can encourage customers to make a purchase from you.
    • Upsell and cross-sell products or services. Once a customer has made a purchase from you, you can use business chat to upsell or cross-sell them other products or services that they might be interested in. This can help you to increase the average order value of your customers.

    How to use business chat to automate your Instagram marketing

    You can use business chat to automate your Instagram marketing in a number of ways. Here are a few examples:

    • Set up welcome messages. You can create a welcome message that will be sent to all new customers who message you. This is a great way to introduce yourself and your business and to provide customers with helpful information.
    • Use quick replies. Quick replies are pre-written responses that you can send to customers with a single tap. This can save you time and allow you to respond to common customer questions quickly and easily.
    • Create chatbot flows. Chatbot flows are a more advanced way to automate your business chat. You can use chatbot flows to create custom responses to customer messages based on their specific questions or needs.

    FAQs about business chat on Instagram

    What is business chat on Instagram?

    Business chat is a messaging feature that allows businesses to connect with their customers directly on Instagram. It is a more sophisticated version of Instagram Direct, with features such as suggested responses, quick replies, and in-chat payment links.

    What are the benefits of using business chat on Instagram?

    There are many benefits to using business chat on Instagram, including:

    • Increased customer engagement: Business chat allows businesses to engage with their customers directly and in real time. This can help to improve customer satisfaction and loyalty.
    • Improved customer service: Business chat can help businesses to provide better customer service by allowing them to answer customer questions quickly and easily.
    • Increased sales: Business chat can help businesses to increase sales by allowing them to sell products and services directly to customers.
    • Automated marketing: Business chat can be used to automate marketing tasks such as sending welcome messages, answering common questions, and upselling and cross-selling products and services.

    How do I use business chat on Instagram?

    To use the feature on Instagram, you need to have a business account. Once you have a business account, you need to enable business chat in your settings. Once business chat is enabled, you will start receiving messages from customers in your Instagram inbox.

    What can I use business chat for on Instagram?

    Business chat can be used for a variety of purposes on Instagram, including:

    • Answering customer questions
    • Providing customer support
    • Generating leads
    • Closing sales
    • Automating marketing tasks

    Is business chat secure?

    Yes, business chat is secure. All messages are encrypted and cannot be read by anyone other than the sender and recipient.

    How can I measure the success of my business chat on Instagram?

    Instagram provides a number of metrics that you can use to measure the success of your business chat, including:

    • Number of messages received
    • Number of messages answered
    • Average response time
    • Customer satisfaction
    • By tracking these metrics, you can see how your business chat is performing and make adjustments as needed.

    What are some best practices for using business chat on Instagram?

    Here are some best practices for using business chat on Instagram:

    • Be responsive: Try to respond to customer messages as quickly as possible.
    • Be helpful and friendly: Provide customers with the information they need and be polite and respectful.
    • Be personalized: Address customers by name and use their interests to personalize your messages.
    • Use automation: Use automation tools to save time and provide customers with a more efficient experience.
  • KP.org/payonline – How to Pay Your Kaiser Permanente Bill Online

    KP.org/payonline – How to Pay Your Kaiser Permanente Bill Online

    Kaiser Permanente PayOnline known as KP.org/payonline is a secure online portal that allows members to pay their medical bills, set up automatic payments, and view their payment history. PayOnline is available to Kaiser Permanente members in all states where Kaiser Permanente operates.

    KP.org/payonline

    To use PayOnline, members must first create a kp.org account. Once they have an account, they can log in to PayOnline and make payments using a variety of methods, including:

    • Checking account
    • Savings account
    • Credit card
    • Debit card

    PayOnline also allows members to set up automatic payments for their recurring medical bills. This can help members to avoid late payments and late fees.

    To view their payment history, members can simply log in to PayOnline and click on the “Payment History” tab. This tab will show a list of all of the member’s past payments, including the date of payment, the amount paid, and the payment method used.

    PayOnline is a convenient and secure way for Kaiser Permanente members to manage their medical bills. It is available 24 hours a day, 7 days a week, and it can be accessed from any computer or mobile device.

    How to pay your kp.org bill online at KP.org/payonline

    To pay your Kaiser Permanente bill online at KP.org/payonline, follow these steps:

    1. Go to kp.org/payonline: and log in to your kp.org account.
    2. Once you are logged in, you will see a summary of your account balance and your due date. To make a payment, click on the “Pay Now” button.
    3. On the next page, you will be able to enter your payment information and choose a payment method. You can pay with a checking account, savings account, credit card, or debit card. You can also set up automatic payments for your recurring medical bills.
    4. Once you have entered your payment information, click on the “Review Payment” button to review your payment details. When you are ready to make the payment, click on the “Submit Payment” button.

    You will receive a confirmation email once your payment has been processed. You can also view your payment history in PayOnline by clicking on the “Payment History” tab.

    Different ways to pay your rent online at KP.org/payonline

    There are several ways to pay your rent online at kp.org:

    Through your online Kaiser Permanente member account

    1. Go to kp.org and sign in to your online account.
    2. Click on the Billing & Payments tab.
    3. Under My Payments, click on Make a Payment.
    4. Select the Rent payment type.
    5. Enter the amount you want to pay and your payment information.
    6. Review your payment details and click on Submit.

    Through the Kaiser Permanente mobile app

    1. Download the Kaiser Permanente mobile app for your smartphone or tablet.
    2. Sign in to your account.
    3. Tap on the Billing & Payments tab.
    4. Under My Payments, tap on Make a Payment.
    5. Select the Rent payment type.
    6. Enter the amount you want to pay and your payment information.
    7. Review your payment details and tap on Submit.

    At Kaiser Permanente Pay Now website

    • Go to the Kaiser Permanente Pay Now website.
    • Enter your Kaiser Permanente member ID number and date of birth.
    • Click on Continue.
    • Select the Rent payment type.
    • Enter the amount you want to pay and your payment information.
    • Review your payment details and click on Submit.

    Through the Kaiser Permanente Pay My Bill by Phone service

    1. Call the Kaiser Permanente Pay My Bill by Phone service at 1-800-325-5438.
    2. Follow the prompts to make a payment.

    Through the Kaiser Permanente Pay My Bill by Mail service

    • Send a check or money order to the following address:
    • Kaiser Permanente
    • PO Box 6150
    • Pleasanton, CA 94566-6150

    Please include your Kaiser Permanente member ID number and your account number on your payment.

    Note: When paying your rent online, you will need to have your Kaiser Permanente member ID number and your rent account number available. You will also need to enter the amount you want to pay and your payment information.

    How to pay your medical bill online at KP.org/payonline

    To pay your medical bill online at KP.org/payonline, you will need to have an online Kaiser Permanente member account.

    1. Go to kp.org and sign in to your online account.
    2. Click on the Billing & Payments tab.
    3. Under My Payments, click on Make a Payment.
    4. Select the Medical Bill payment type.
    5. Enter the amount you want to pay and your payment information.
    6. Review your payment details and click on Submit.

    You can also pay your medical bill online at KP.org/payonline without signing in to an account. To do this, go to the Kaiser Permanente Pay Now website and enter your Kaiser Permanente member ID number and date of birth. You will then be able to make a payment without having to sign in.

    How to set up a recurring payment at KP.org/payonline

    To set up a recurring payment at KP.org/payonline, you will need to have an online Kaiser Permanente member account.

    • Go to kp.org and sign in to your online account.
    • Click on the Billing & Payments tab.
    • Under My Payments, click on Set Up Recurring Payments.
    • Select the payment type that you want to set up a recurring payment for.
    • Enter the amount you want to pay and the frequency of your payments.
    • Enter your payment information.
    • Review your payment details and click on Submit.

    Once you have set up a recurring payment, it will be processed automatically on the date that you have specified. You can change or cancel your recurring payments at any time by logging into your online account and clicking on Manage Recurring Payments.

    Also, you can set up recurring payments for the following types of bills at KP.org/payonline:

    • Medical bills
    • Dental bills
    • Vision bills
    • Prescription drug bills
    • Rent

    You can also set up recurring payments for multiple bills at once.

    Benefits of paying yourKP.org/payonline bill online

    There are many benefits to paying your Kaiser Permanente (KP) bill online, including:

    • Convenience: You can pay your bill from anywhere, at any time, using a computer, smartphone, or tablet.
    • Security: KP uses state-of-the-art security measures to protect your personal and financial information.
    • Flexibility: You can pay your bill with a checking account, savings account, credit card, or debit card. You can also set up automatic payments so you never miss a due date.
    • Control: You can view your payment history and track your spending online.
    • Paperless: You can receive your bill electronically and avoid paper clutter.
    • Environmental benefits: Using PayOnline helps to reduce paper waste and protect the environment.

    Payment options available at KP.org/payonline

    The following payment options are available at KP.org/payonline:

    • Checking account
    • Savings account
    • Credit or debit cards
    • Visa
    • Master Card
    • American Express
    • Discover
    • Health Savings Account (HSA)
    • Health Reimbursement Arrangement (HRA)
    • Flexible Spending Account (FSA)

    You can pay your medical bills, dental bills, vision bills, prescription drug bills, and rent online at KP.org/payonline. You can also set up recurring payments for your bills so that they are paid automatically each month.

    Troubleshooting tips for paying your bill online at KP.org/payonline

    If you’re having trouble paying your Kaiser Permanente bill online, here are some troubleshooting tips:

    • Make sure you have the correct account number and password
    • Try clearing your browser’s cache and cookies
    • Try using a different browser
    • If you’re still having trouble, contact Kaiser Permanente customer service

    Security tips for paying your Kaiser Permanente bill online

    • Only pay your bill on a secure website
    • Make sure your computer has up-to-date security software
    • Be careful about opening emails or clicking on links from unknown sender

    Alternatives to paying your Kaiser Permanente bill online

    If you’re looking for an alternative to paying your Kaiser Permanente bill online, here are a few options:

    • You can pay by mail
    • You can pay by phone
    • You can pay in person at a Kaiser Permanente facility

    FAQ about kp.org online payments

    How do I make a payment toward my medical bill online?

    To make an online payment toward a medical bill:

    • Visit the Kaiser Permanente Billing main page: https://healthy.kaiserpermanente.org/billpay.
    • Select the View and Pay button.
    • From your Billing Summary, select the Pay button to make a payment toward that bill.

    How do I add a new payment method for an active payment plan?

    To add a new payment method for an active payment plan:

    1. Select the Add payment method radio button from the “Add your payment method” screen.
    2. Enter your credit card information. Note: If you would like to use a checking or savings account as a payment method, select the add a checking / savings account link on the page and then enter your bank account information.
    3. Select the Next button.
    4. Select the Change your payment method link.
    5. Select the Manage my payment methods link.
    6. Delete your old payment method by selecting Delete.
    7. Select the Back button.
    8. Finally, select the Next button and proceed with updating your payment plan.

    What forms of payment are accepted online?

    You can make an online payment using a credit card, debit card, or checking or savings account.

    How much can I pay online?

    You can pay up to the full amount of your bill online.

    Is there a fee for making an online payment?

    There is no fee for making an online payment.

    How long does it take for my payment to be processed?

    Payments made online are typically processed within 1-2 business days.

    Can I schedule a payment in advance?

    Yes, you can schedule a payment in advance. To do this, select the Schedule a payment option from the Pay screen.

    Can I set up automatic payments?

    Yes, you can set up automatic payments for your medical bills. To do this, select the Set up automatic payments option from the Pay screen.

    How do I view my payment history?

    To view your payment history, sign in to kp.org/payonline. Your payment history will show up to 13 months of payments.

    I have a question about my bill. Who can I contact?

    If you have a question about your bill, please contact Kaiser Permanente Member Services at 1-800-846-4200.

  • MyLACountyBenefits – Apply for Benefits and Manage Your Account

    MyLACountyBenefits – Apply for Benefits and Manage Your Account

    MyLACountyBenefits is a website that provides information about benefits programs available to residents of Los Angeles County. It is a one-stop shop for information about CalFresh, Medi-Cal, CalWORKs, and other programs.

    MyLACountyBenefits can help you find out if you are eligible for benefits, how to apply, and where to get help. You can also use the website to track your application status and update your information.

    MyLACountyBenefits

    On the MyLACountyBenefits website, you can:

    • Learn about the different benefits programs available
    • See if you are eligible for a particular program
    • Apply for benefits online
    • Check the status of your application
    • Find out where to get help with your application

    To use MyLACountyBenefits, you will need to create an account. You can do this by visiting the website and clicking on the “Create an Account” link. You will need to provide some personal information, such as your name, address, and date of birth.

    Once you have created an account, you can log in and start browsing the website. You can find information about benefits programs by clicking on the “Benefits” link. You can also search for programs by keyword.

    What is MyLACountyBenefits

    MyLACountyBenefits is a secure website for Los Angeles County employees to access information about their benefits and make changes to their coverage. Employees can use MyLACountyBenefits to:

    • View their benefits summary
    • Enroll in or change benefits
    • File and track claims
    • Update their personal information
    • Download forms and other resources

    To access MyLACountyBenefits, employees must log in with their County ID number and password. If you are a new employee, you will receive your County ID number and password in your onboarding paperwork.

    Types of benefits in MyLACountyBenefits

    There are a variety of benefits available to Los Angeles County residents, including:

    • CalFresh (food stamps)
    • Medi-Cal (health insurance)
    • CalWORKs (cash assistance)
    • General Relief
    • In-Home Supportive Services (IHSS)
    • Low Income Housing Energy Assistance Program (LIHEAP)
    • Child Care Subsidy
    • CalFresh Healthy Incentives Program (HIP)
    • Golden State Stimulus

    Eligibility requirements for MyLACountyBenefits

    The eligibility requirements for MyLACountyBenefits vary depending on the specific benefit you are applying for. However, there are some general requirements that apply to all benefits:

    • You must be a resident of Los Angeles County.
    • You must be a US citizen or permanent resident.
    • You must have a low income.
    • You must meet certain citizenship or immigration requirements.

    In addition to these general requirements, there may be additional requirements for specific benefits. For example, to be eligible for CalFresh (food stamps), you must also have a Social Security number.

    To find out the specific eligibility requirements for the benefit you are interested in, you can visit the MyLACountyBenefits website or call the Benefits Hotline at (213) 388-9982.

    Here are some additional details about the eligibility requirements for some of the most common MyLACountyBenefits:

    • CalFresh (food stamps): You must have a Social Security number and meet certain income requirements.
    • Medi-Cal (health insurance): You must meet certain income and citizenship requirements.
    • CalWORKs (cash assistance): You must have a child under the age of 18 or be pregnant. You must also meet certain income and citizenship requirements.
    • General Relief (cash assistance): You must be 18 years of age or older and meet certain income and citizenship requirements.

    If you are unsure whether you are eligible for a particular benefit, you can contact MyLACountyBenefits for assistance.

    How to use the MyLACountyBenefits website

    Login the MyLACountyBenefits website:

    1. Go to the MyLACountyBenefits website:
    2. Click on the “Log In” button in the top right corner of the page.
    3. Enter your username and password, and click on the “Log In” button.
    4. Once you are logged in, you will be taken to your dashboard.
    5. From your dashboard, you can view your benefits, apply for new benefits, and manage your existing benefits.

    To apply for a new benefit:

    1. Click on the “Apply for Benefits” button in the top right corner of the page.
    2. Select the benefit you want to apply for.
    3. Click on the “Apply” button.
    4. Complete the application form and submit it.
    5. You will receive a notification once your application has been processed.

    To manage your existing benefits:

    1. Click on the “Manage Benefits” button in the top right corner of the page.
    2. Select the benefit you want to manage.
    3. Click on the “Manage” button.
    4. From the Manage Benefit page, you can view your benefit information, make changes to your benefits, and report changes in your income or household composition.

    How to apply for MyLACountyBenefits

    To apply the MyLACountyBenefits website:

    1. Go to the MyLACountyBenefits website:
    2. Click on the “Apply for Benefits” button.
    3. Select the benefit you want to apply for.
    4. Create an account or sign in to your existing account.
    5. Complete the application form and submit it.

    You will receive a notification once your application has been processed.

    MyLACountyBenefits benefits card

    Here is some information about MyLACountyBenefits benefits card:

    You can find more information about your MyLACountyBenefits benefits card on the MyHR » Benefits Quick Guide page of the LA County website.

    If you have any questions about your MyLACountyBenefits benefits card, you can call the Online Registration Help Center at 833-622-1666. Representatives are available to assist you from 8 a.m. to 4 p.m., Monday – Friday.

    You can also find more information about your MyLACountyBenefits benefits card on the MyLACountyBenefits website.

    If you are unable to access the MyLACountyBenefits website, you can call the Employee Benefits Hotline at (213) 388-9982, Mon – Fri, 8 am – 4 pm. Your issue will be referred to a benefits analyst for resolution.

    How to appeal a denial of benefits in Los Angeles County

    To appeal a denial of benefits in Los Angeles County, you can follow these steps:

    • Contact the Los Angeles County Department of Public Social Services (DPSS) at (866) 613-3777.
    • Explain the reason for your appeal and provide any supporting documentation.
    • A DPSS representative will review your appeal and make a decision.
    • If your appeal is denied, you can request a hearing with a DPSS administrative law judge.
    • At the hearing, you will have the opportunity to present your case and evidence.
    • The administrative law judge will make a decision on your appeal.

    If you are still not satisfied with the decision, you can file a lawsuit in Los Angeles County Superior Court.

    Troubleshooting common problems with MyLACountyBenefits

    I can’t log in to my account

    • Check to make sure you are entering the correct username and password.
    • If you have forgotten your password, you can reset it by clicking on the “Forgot Password?” link on the login page.
    • If you are still having problems logging in, you can contact the MyLACountyBenefits Benefits Hotline at (213) 388-9982 for assistance.

    I’m not sure what benefits I’m eligible for

    • Visit the MyLACountyBenefits website and click on the “Benefits” tab. On this page, you will find a list of all of the benefits that are available through MyLACountyBenefits.
    • You can also use the MyLACountyBenefits Benefits Screener to determine which benefits you may be eligible for.
    • If you have any questions about your eligibility, you can contact the MyLACountyBenefits Benefits Hotline at (213) 388-9982 for assistance.

    I’m having trouble applying for benefits

    • Make sure you have all of the required documentation before you start your application. This may include things like your Social Security number, proof of income, and proof of residency.
    • Be honest and accurate when completing your application. Any false or misleading information could delay or prevent the processing of your application.
    • Review your application carefully before you submit it. Make sure that all of the information is correct and that you have completed all of the required fields.
    • If you have any questions or problems, contact the MyLACountyBenefits Benefits Hotline at (213) 388-9982 for assistance.

    My benefits were denied, and I don’t know why

    • Review your denial notice carefully to see the reason for the denial.
    • If you believe that your benefits were denied in error, you can appeal the decision. To do this, you will need to write an appeal letter and submit it to the MyLACountyBenefits Benefits Hotline.
    • You can also contact the MyLACountyBenefits Benefits Hotline at (213) 388-9982 to speak with a representative who can help you with your appeal.

    I need help managing my benefits

    • Visit the MyLACountyBenefits website and click on the “Manage My Benefits” tab. On this page, you will find information on how to manage your benefits, including how to change your address, report a lost or stolen benefits card, and update your contact information.
    • You can also contact the MyLACountyBenefits Benefits Hotline at (213) 388-9982 to speak with a representative who can help you manage your benefits.

    MyLA County benefits FAQs

    What benefits are available through MyLA County?

    MyLA County offers a variety of benefits to eligible residents, including:

    • CalFresh (food stamps)
    • Medi-Cal (health insurance)
    • CalWORKs (cash assistance)
    • General Relief (cash assistance)
    • In-Home Supportive Services (IHSS)
    • CalABLE (disability savings program)
    • Low Income Housing Energy Assistance Program (LIHEAP)

    How do I know if I am eligible for MyLA County benefits?

    You can use the MyLA County benefits eligibility screener to see what benefits you may be eligible for. You can also contact MyLA County customer support for assistance.

    How do I apply for MyLA County benefits?

    You can apply for MyLA County benefits online, by phone, or in person. To apply online, visit the MyLA County website. To apply by phone, call (866) 613-3777. Also. to apply in person, visit your local DPSS office.

    What documentation do I need to apply for MyLA County benefits?

    The documentation you need to apply for MyLA County benefits will vary depending on the specific benefit you are applying for. However, some common documentation includes:

    • Proof of identity
    • Proof of income
    • Proof of residency
    • Social Security number (if applicable)

    How long does it take to process a MyLA County benefits application?

    The processing time for MyLA County benefits applications varies depending on the specific benefit you are applying for. However, most applications are processed within 30 days.

    What if I am denied for MyLA County benefits?

    If you are denied for MyLA County benefits, you have the right to appeal the decision. To appeal, you must write a letter to DPSS explaining why you believe the decision was wrong. You must also include any supporting documentation.

  • www.mybenefitscalwin.org – Apply for Food Stamps, Cash Aid, and Other Benefits

    www.mybenefitscalwin.org – Apply for Food Stamps, Cash Aid, and Other Benefits

    www.mybenefitscalwin.org is a secure online portal that allows California residents to apply for, manage, and track their benefits for CalFresh (food assistance), Medi-Cal (health insurance), and CalWORKs (cash assistance). It is a convenient and easy-to-use way to access benefits and services, and it can be used from any computer or mobile device with an internet connection.

    www.mybenefitscalwin.org

    Here are some of the things you can do with www.mybenefitscalwin.org:

    • Apply for benefits online
    • Check your eligibility status and benefit amounts
    • View and print benefit notices
    • Submit required reports and renewal forms
    • Communicate with your caseworker
    • Find a CalWIN office near you

    To create a MyBenefits CalWIN account, you will need to provide your name, address, date of birth, and Social Security number. You can also create an account for your family members. Once you have created an account, you can log in and start using www.mybenefitscalwin.org right away.

    MyBenefits CalWIN is available in multiple languages, including English, Spanish, Chinese, Russian, Arabic, Armenian, Cambodian, Farsi, Hmong, Japanese, Korean, Laotian, Mienh, Portuguese, Punjabi, Tagalog, Ukrainian, and Vietnamese.

    How to use www.mybenefitscalwin.org

    To use MyBenefitsCalWIN.org, simply visit the website and create an account. Once you have created an account, you can log in and view the benefits programs that you are eligible for. You can also apply for benefits online or print out an application to mail in.

    Here are the steps:

    • Step 1: Go to www.mybenefitscalwin.org.
    • Step 2: Create an account or log in to your existing account.
    • Step 3: Select the benefits programs that you are interested in.
    • Step 4: Complete the application forms for each benefits program.
    • Step 5: Submit your applications.

    Benefits program on www.mybenefitscalwin.org

    The following benefits programs are available on www.mybenefitscalwin.org:

    • CalFresh (food assistance): CalFresh provides monthly benefits to purchase food at participating grocery stores and farmers markets. CalFresh benefits are based on household income and size.
    • Medi-Cal (health insurance): Medi-Cal provides low-cost or free health insurance to eligible individuals and families. Medi-Cal covers a wide range of health services, including doctor visits, hospital stays, prescription drugs, and dental care.
    • CalWORKs (cash assistance): CalWORKs provides temporary cash assistance to low-income families with children under the age of 18. CalWORKs also provides job training and other services to help families achieve self-sufficiency.

    In addition to these three main programs, MyBenefitsCalWIN also provides information and resources on a variety of other benefits programs, including:

    • General Assistance (GA): GA provides cash assistance to low-income adults who are not eligible for CalWORKs.
    • County Medically Indigent Services Program (CMISP): CMISP provides health insurance to low-income adults who are not eligible for Medi-Cal.
    • California Work Opportunity and Responsibility to Kids (CWORK): CWORK provides job training and other support services to low-income adults who are required to work or participate in job training in order to receive CalFresh or CalWORKs benefits.
    • CalMAX and Medi-Cal for All: CalMAX and Medi-Cal for All are two new state-funded programs that provide health insurance to low- and middle-income Californians who were previously ineligible for Medi-Cal.

    If you are a California resident and you are unsure which benefits programs you may be eligible for, you can visit the MyBenefitsCalWIN website or contact your local county social services office for more information.

    Eligibility requirements for each benefits program

    The eligibility requirements for each benefits program on MyBenefitsCalWIN vary depending on the program. Here is a brief overview of the eligibility requirements for each program:

    CalFresh

    To be eligible for CalFresh, you must:

    • Be a California resident.
    • Meet income and asset limits.
    • Be a U.S. citizen or a qualified immigrant.

    Medi-Cal

    To be eligible for Medi-Cal, you must:

    • Be a California resident.
    • Meet income and asset limits.
    • Be a U.S. citizen or a qualified immigrant.

    CalWORKs

    To be eligible for CalWORKs, you must:

    • Be a California resident.
    • Have a child under the age of 18 living in your home.
    • Meet income and asset limits.
    • Be a U.S. citizen or a qualified immigrant.

    For more detailed information on the eligibility requirements for each benefits program, please visit the MyBenefitsCalWIN website or contact your local county social services office.

    Here are some additional eligibility requirements that may apply to certain programs or populations:

    • General Assistance (GA): GA is only available to adults who are not eligible for CalWORKs.
    • County Medically Indigent Services Program (CMISP): CMISP is only available to adults who are not eligible for Medi-Cal.
    • California Work Opportunity and Responsibility to Kids (CWORK): CWORK requirements apply to all adults who are receiving CalFresh or CalWORKs benefits, unless they are exempt for certain reasons.
    • CalMAX and Medi-Cal for All: CalMAX and Medi-Cal for All are available to low- and middle-income Californians who were previously ineligible for Medi-Cal. However, there are some income and asset limits that apply to these programs.

    If you are unsure whether you meet the eligibility requirements for a particular benefits program, please contact your local county social services office for more information.

    How to apply for benefits online at www.mybenefitscalwin.org

    To apply for benefits on MyBenefitsCalWIN, you will need to create an account and provide some basic information about yourself and your household. Once you have created an account, you can complete the online application for the benefit programs you are interested in.

    Here are the steps on how to apply for benefits on MyBenefitsCalWIN:

    1. Go to the MyBenefitsCalWIN website and click on the “Create an Account” button.
    2. Enter your name, address, date of birth, and Social Security number. You can also create an account for your family members.
    3. Once you have created an account, log in and click on the “Apply for Benefits” button.
    4. Select the benefit programs you are interested in and complete the online application.
    5. Be sure to review your application carefully before submitting it.
    6. After you have submitted your application, you will be contacted by a caseworker who will review your information and determine your eligibility for benefits.
    7. If you are eligible, you will receive a benefit notice in the mail explaining how to access your benefits.

    If you need help with the online application, you can contact your local county social services office or visit one of their offices in person.

    By phone

    To apply for benefits by phone, you will need to call your local county social services office. You can find the phone number for your county social services office on the MyBenefitsCalWIN website.

    Once you have called your county social services office, you will need to speak with a caseworker. The caseworker will ask you some basic information about yourself and your household, such as your name, address, date of birth, and Social Security number. They will also ask you about your income and assets.

    After the caseworker has gathered this information, they will review your eligibility for benefits. If you are eligible, they will help you to complete the application process.

    In person

    To apply for benefits in person, you will need to visit your local county social services office. To find the address of your local county social services office, you can visit the MyBenefitsCalWIN website or call the CalFresh Information Line at 1-877-284-7328.

    How to benefits status online at www.mybenefitscalwin.org

    To check your benefits status online at MyBenefitsCalWIN, you will need to create an account and log in. Once you are logged in, you will be able to view your benefits information, including your eligibility status, benefit amounts, and payment dates.

    To check your benefits status:

    1. Go to the MyBenefitsCalWIN website and click on the “Sign In” button.
    2. Enter your User ID and password and click on the “Sign In” button.
    3. Once you are logged in, you will be taken to your MyBenefitsCalWIN dashboard.
    4. Click on the “Benefits” tab.
    5. On the “Benefits” tab, you will see a list of all of the benefits programs that you are enrolled in.
    6. To check the status of a particular benefit program, click on the “View Details” button next to the program name.
    7. On the “Benefit Details” page, you will see information about your eligibility status, benefit amount, and payment date.

    You can also check your benefits status by clicking on the “My Notices” tab on your MyBenefitsCalWIN dashboard. The “My Notices” tab will show you a list of all of the notices that you have received from the California Department of Social Services (CDSS). You can click on a notice to view more information about your benefits.

    How to manage your benefits on www.mybenefitscalwin.org

    To manage your benefits on www.mybenefitscalwin.org, you can:

    • Check your case status: You can view your case status to see if your application has been processed, if you need to provide any additional information, or if you have been approved for benefits.
    • Report changes: If you have any changes to your household, income, or expenses, you need to report them to your county office as soon as possible. You can do this online through www.mybenefitscalwin.org.
    • Renew your benefits: Most benefits need to be renewed on a regular basis. You can renew your benefits online through www.mybenefitscalwin.org.
    • View your benefit information: You can view your benefit information, such as the type of benefits you receive, the amount of benefits you receive, and the date your benefits expire.
    • Print notices and letters: You can print notices and letters from your county office, such as your benefit award letter or your renewal notice.

    To access these features, log in to www.mybenefitscalwin.org and click on the “My Benefits” tab.

    FAQs

    What benefits am I eligible for?

    To determine what benefits you are eligible for in California, you can use the MyBenefits CalWIN eligibility checker. You will need to provide some personal information, such as your name, address, and date of birth. You will also need to answer questions about your household, income, and expenses.

    Once you have completed the eligibility checker, you will be given a list of benefits that you may be eligible for. You can then click on each benefit to learn more about it and how to apply.

    How do I apply for benefits on www.mybenefitscalwin.org?

    To apply for benefits on MyBenefits CalWIN, you will need to create an account. You can do this by going to the MyBenefits CalWIN website and clicking on the “Create An Account” button. Once you have created an account, you can log in and start the application process.

    When will I receive my benefits?

    The time it takes to receive your benefits after applying on MyBenefits CalWIN depends on a number of factors, including:

    • The type of benefits you are applying for
    • The complexity of your case
    • The workload of your county office

    In general, you can expect to receive your benefits within 30 days of applying. However, it may take longer in some cases.

    What do I do if I have a problem with my benefits?

    If you have a problem with your benefits, you should contact your county office. You can find the contact information for your county office on the MyBenefits CalWIN website.

    When you contact your county office, you will need to provide your name, date of birth, and case number. You should also be prepared to explain the problem you are having and any steps you have already taken to try to resolve the problem.

    A county representative will review your case and try to help you resolve the problem. If the representative is not able to resolve the problem immediately, they may escalate the issue to a supervisor or manager.